Selvedge Name Tag
Written for Ruby Star Society by Hannah Parks (@halfsquarehannah)!
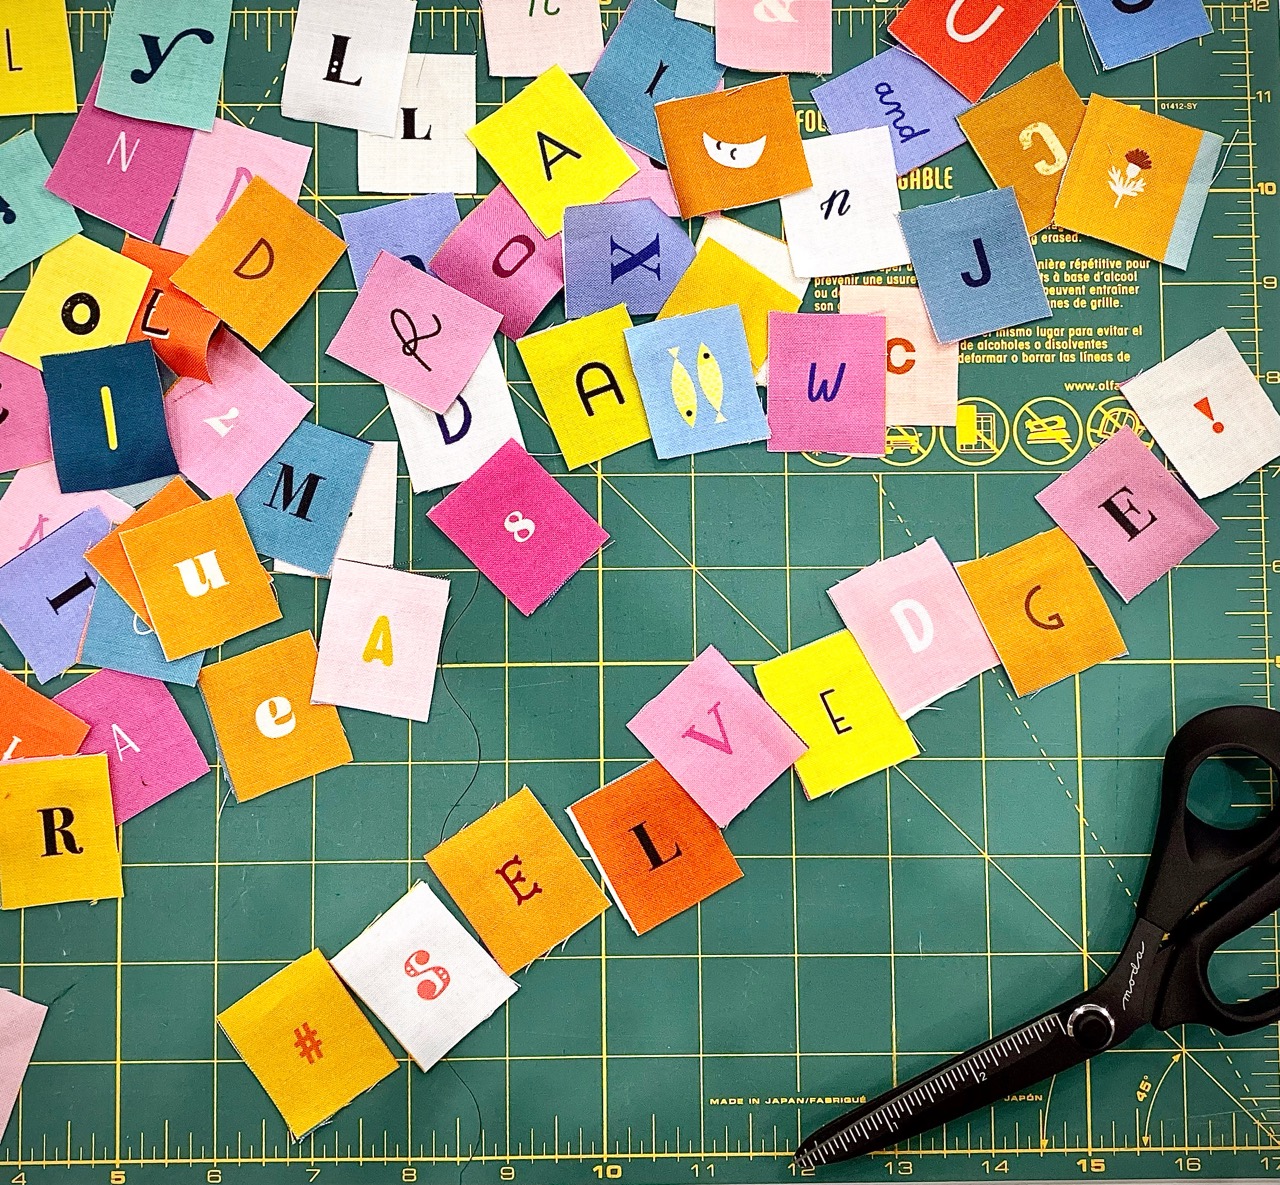
Let's put our cute selvedge to use! Whether that be fabric from our Selvedge Magic collection, or old and new selvedges you have collected, this tutorial will show you how to piece a word or name out of selvedge letters. You can use this for quilt labels, name tags, or a fun detail in a quilt block.
Supplies Needed:
- Selvedges from your stash, or Selvedge Magic fabric!
- Acrylic ruler with a ¼” marking
- Rotary cutter
- Sewing machine
Planning Instructions:
1. On a piece of scrap paper, jot down the name or word that you're planning to make. This will be a helpful reference to cross off letters as you search for selvedges, especially if you're making multiple words.
2. With your written notes in hand, look through your stash for letters. Don't cut anything out just yet; make a pile of all your options so that you can audition colors and fonts before making final choices.
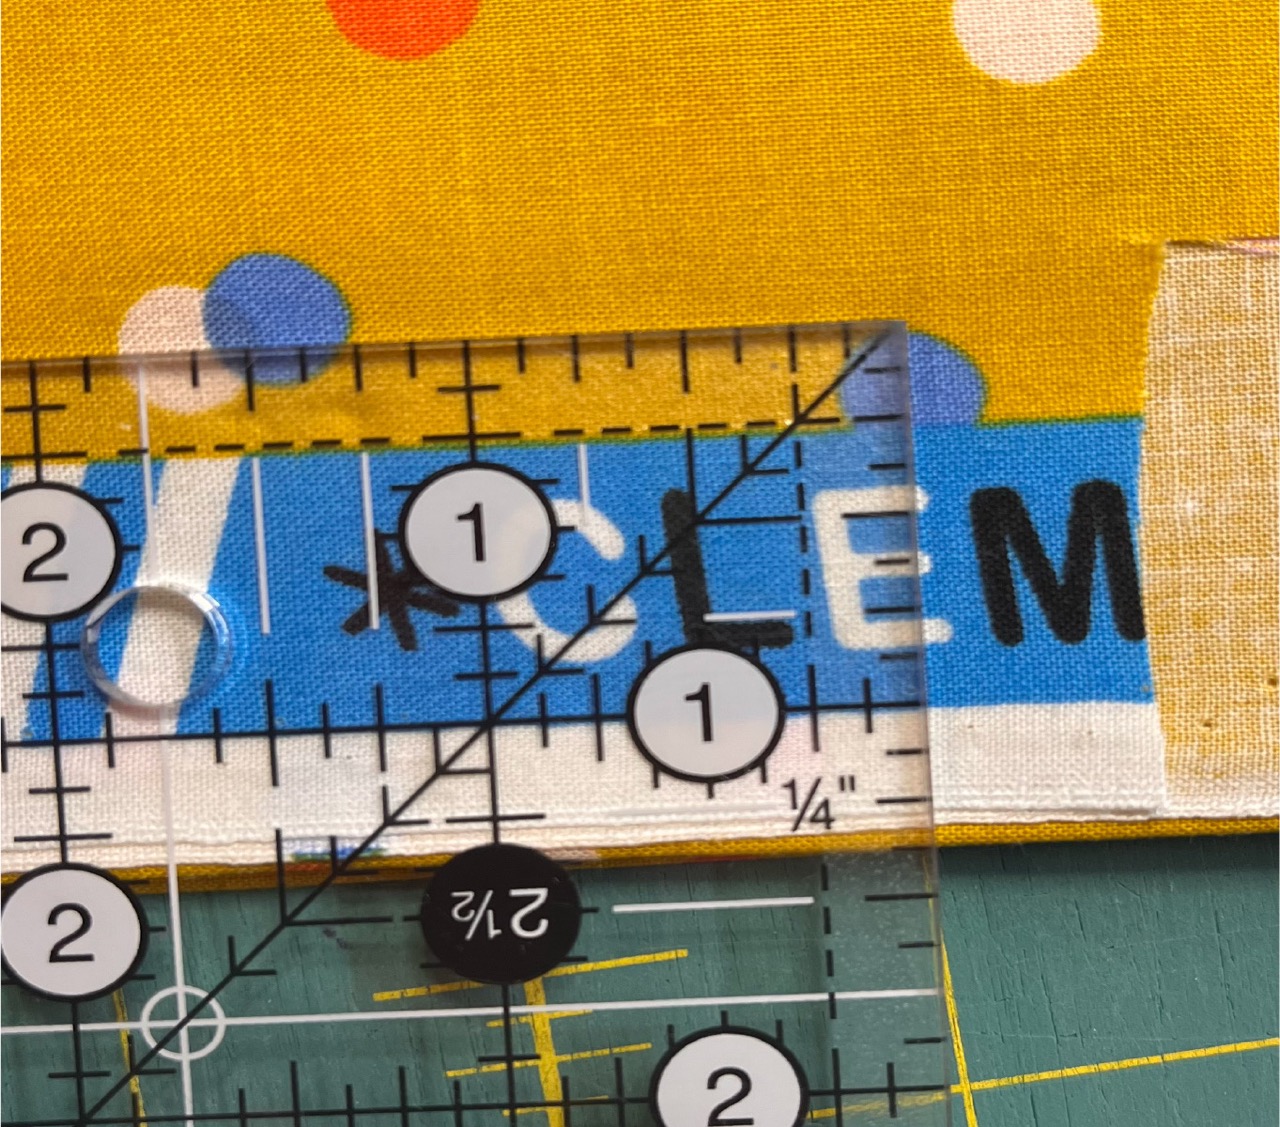
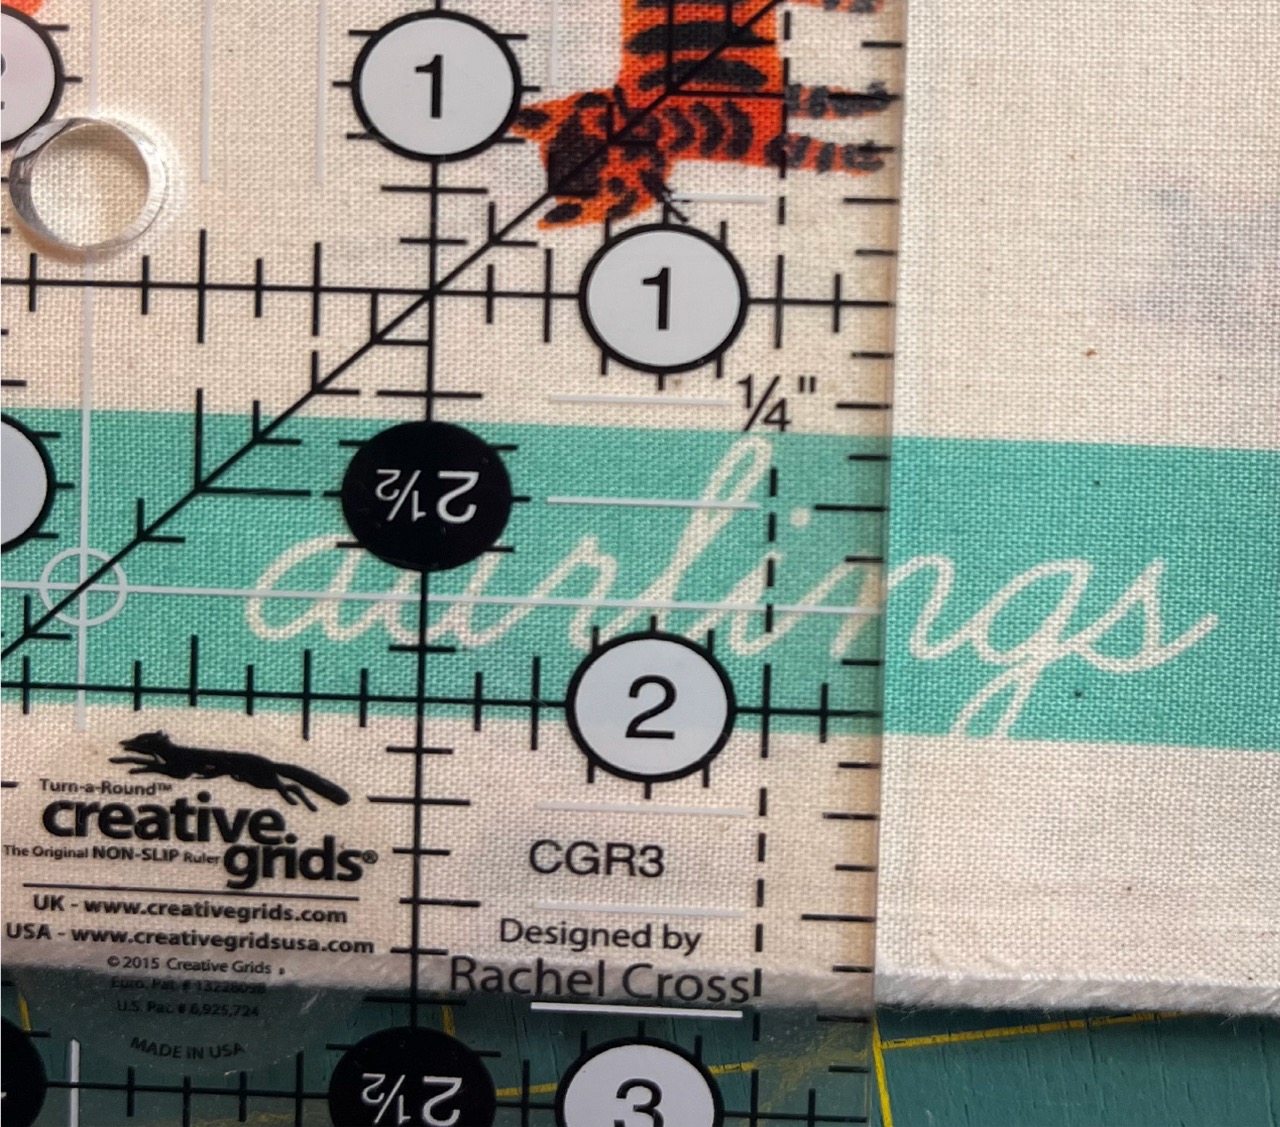
3. As you look for letters, pay attention to the letter spacing, which range from easy, wide letters on some selvedges to tricky, closely spaced script on others. Ideally, there will be a clear space between letters for your seam placement.
To test for this, use the ¼” line on an acrylic ruler and set that line in the space to the left and right of your intended letter. Ideally, this ¼” line won't touch the letter that you intend to use, or the neighboring letters. See the images below for examples.
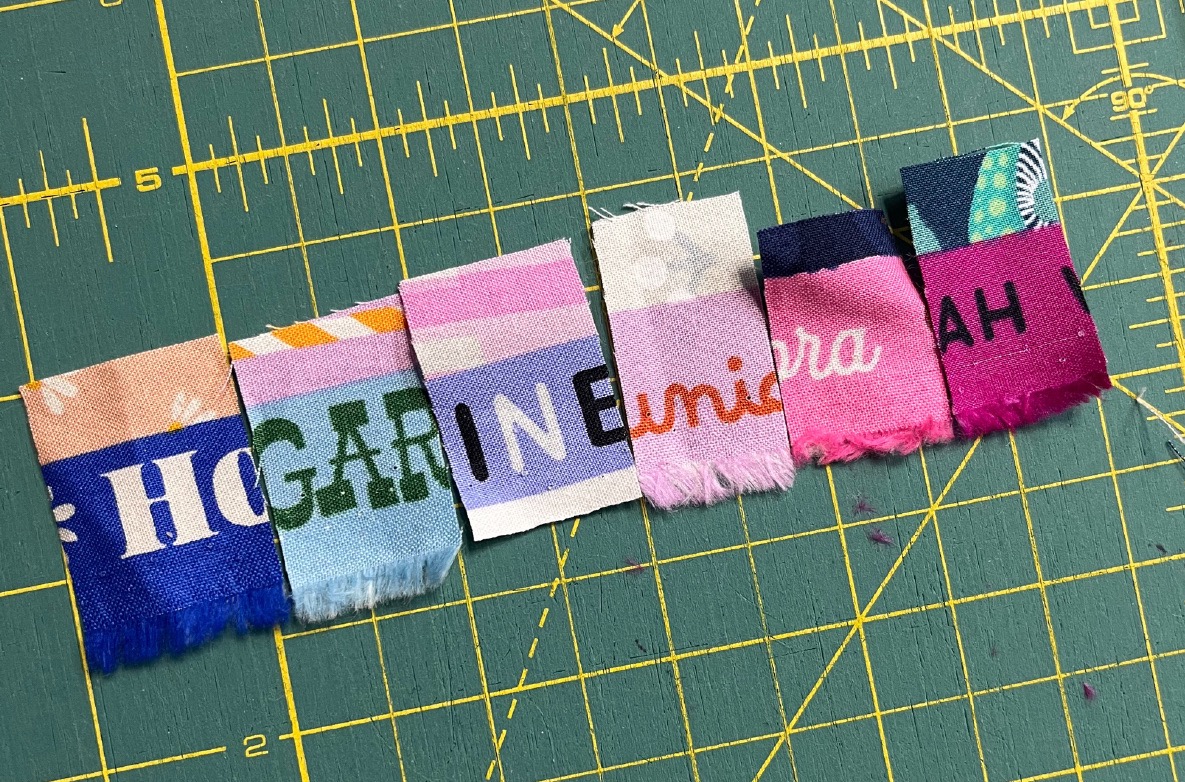
4. Look at the selvedges you've collected for your label, and pick which letters you'd like to use. Double check your note to make sure each letter is accounted for. Once you have decided on the letters you'd like to use, proceed to cutting instructions.
Cutting Instructions:
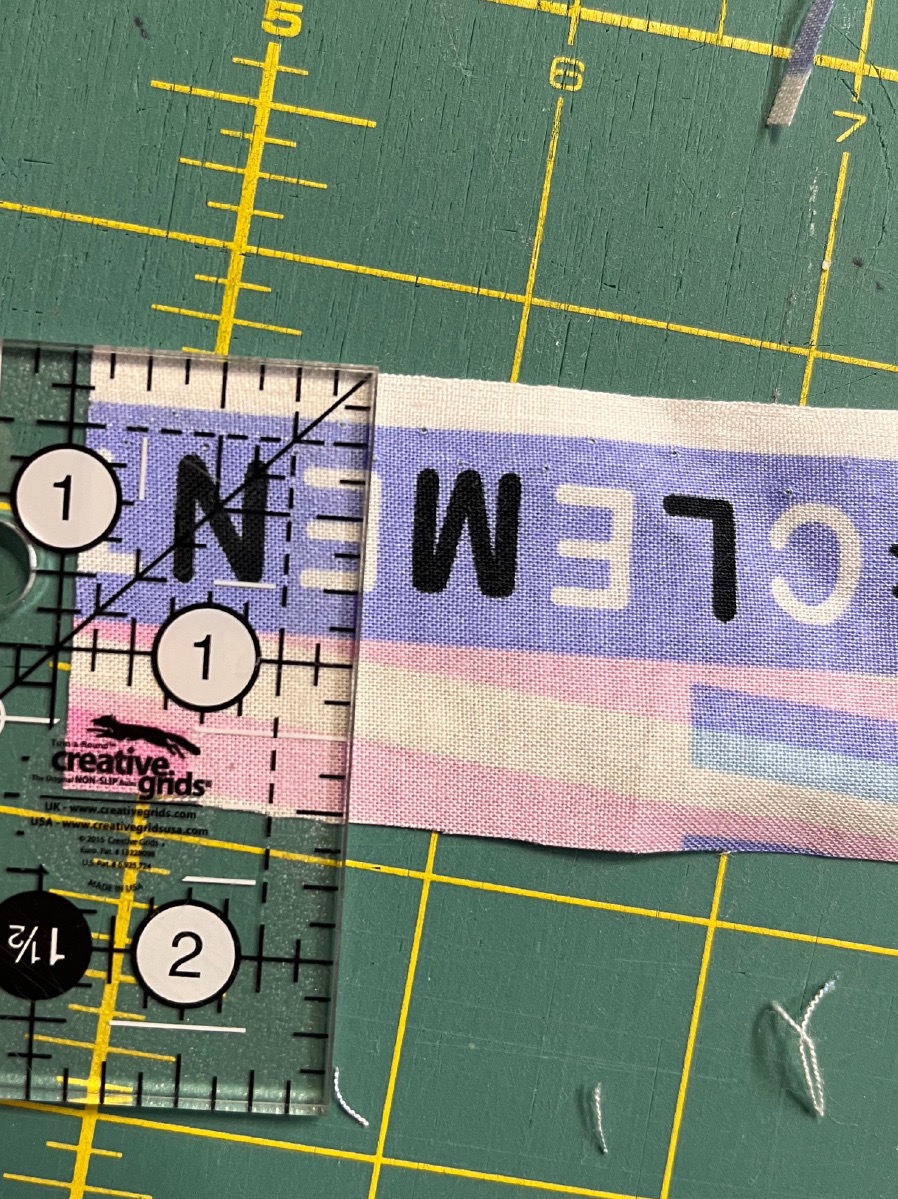
1. Using an acrylic ruler with a ¼” line, carefully cut out your selvedge letters, ensuring the following spacing:
- Above the letter: At least a ¼”. If you're using the Selvedge Magic print, the solid color spaces between each selvedge are exactly 1/2” wide, so you'll cut a ¼” seam allowance. If you're using actual selvedges from other collections, you might leave a bit more than a ¼” so that a bit of the print peeks through on the finished label for a fun little detail.
- Below the letter: Cut at least ¼” from the bottom of the letter. If you’re using an actual selvedge, you can get away with a bit under ¼” because this edge is finished and won’t fray.
- To the left and right of the letter: Place the ¼” line on your ruler in the space between your intended letter and the neighboring letter on the selvedge (see below image). Cut along the edge of your ruler to create a ¼” seam allowance on both sides of the letter. Be careful on this part, because accuracy here will help later when you’re piecing.
2. Once all your letters are cut, arrange them in order (double checking your spelling and arrangement!) and carry them over to your sewing machine.
Piecing Instructions - Letters!
1. Use a precise ¼” seam allowance, sew your letters together in pairs.
2. Press seams open.
3. Repeat this process of sewing pairs and pressing seams open, until your words are fully pieced.
4. Trim the top and bottom edges, being sure to leave at least a ¼” of space around the letters for a seam allowance.
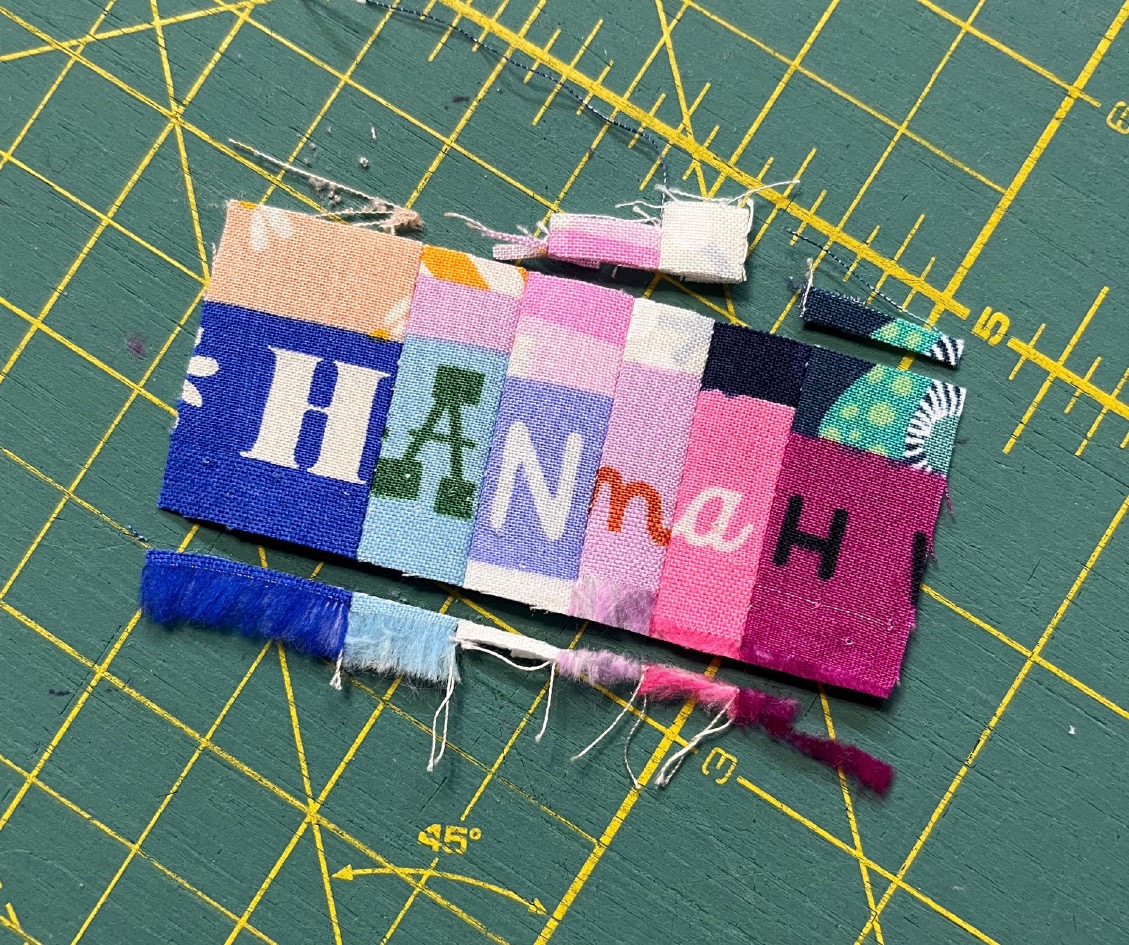
5. Add background fabric to reach your desired size for a label, sashing, quilt block, or other intended purpose.
And mostly importantly, have fun and play!